

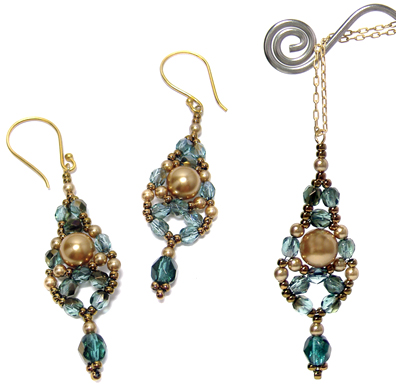
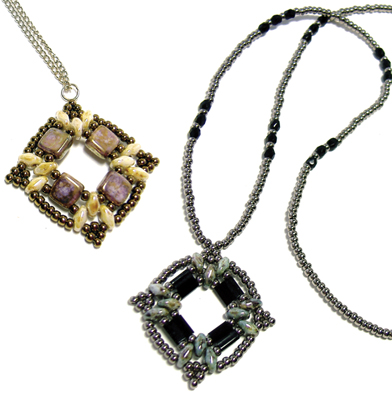
Wednesday, December 25, 2013
Friday, November 1, 2013
How to make a drop earrings
Drop earrings are simple and easy to make. However, you can use a lot of different materials and beads like semi precious stones, crystal, silver wires, chandeliers and charms etc. Be creative in designing your own drop earrings!
We will now try to make a drop earrings using silver wires, silver beads, head pins and Swarovski crystal.

Materials that you need:
1. A pair of sterling silver ear wires (ear hooks). You can also use metal or silver plated ear wires. Other type of ear wires like ear posts with ear nuts is also ok.
2. A pair of headpins or eye pins.
3. A few beads and bead caps of your own choice.
Tools needed:
1. Wire cutters
2. Round nose Pliers
Let's us make an ear hooks with Swarovski 5040 Briolette 8mm crystal, silver bead caps and silver beads , silver head pins and some short silver wire.
2. A pair of headpins or eye pins.
3. A few beads and bead caps of your own choice.
Tools needed:
1. Wire cutters
2. Round nose Pliers
Let's us make an ear hooks with Swarovski 5040 Briolette 8mm crystal, silver bead caps and silver beads , silver head pins and some short silver wire.
1. Put the 5040 8mm Aquamarine bead onto the head pin with the flat head facing bottom.

2. Put a bead cap on top of the aquamarine bead.
3. Use the round nose pliers to bend the head pin to 90 degree.

4. Bend the end of the head pin to complete the loop, cut the wire if it is too long.


5. Take a short silver wire, bend one end of the wire to 90 degree then bend it further to complete a loop.
6. Put the silver bead onto the wire. (picture showed using Swarovski 5744 flower bead instead of silver bead)

7. Cut the end of wire if it is too long, leave about 7-10mm for making a loop.
8. Make another loop to finish this part. (again, picture using Swarovski 5744 flower bead instead of silver bead)

9. Slip the crystal & bead cap part onto the loop of silver bead part, then slip the other loop onto your ear hook.
10. Close all the loops shut so that the ear wires will not fall apart and that's it. Put them on to try your new creation!

Points to note:
1. Using several heavy beads such as glass beads or large beads might make the earrings too heavy to wear.
2. Experiment with different colors and styles of beads, use spacer beads to frame and break up the pattern of the beads to achieve different looks.
Do you have your own creation to share?
1. Using several heavy beads such as glass beads or large beads might make the earrings too heavy to wear.
2. Experiment with different colors and styles of beads, use spacer beads to frame and break up the pattern of the beads to achieve different looks.
Do you have your own creation to share?
Monday, October 28, 2013
Looking for ideas for your project? Great pattern from aroundthebeadingtable.com
We will periodically recommend some good beading resources that we feel are useful to beader or for jewelry crafting. Today we will recommend the Around the Beading Table (http://www.aroundthebeadingtable.com).
They have a large selections of earrings, necklaces, pendants, rivoli & bracelet patterns, many of the tutorials and patterns are free and their paid offering is affordable.
Please check them out if you are looking for patterns or ideas to brighten your ideas:
Thursday, August 29, 2013
Tutorials of Two Leather Cord Bracelets
| Leather Cord Bracelets |
Two simply ways to make leather cord bracelets.
Different kinds of cords and metal parts can be perfectly matched.
| Leather cords and metal link |
Make a knot by using a thin wax cord which connects to the "Dream" crystal rhinestone link.
| Make a knot at one end |
Another knot at the other side.
| Another knot at the other end |
Use wax cord to wrap around another thicker leather cord.
| Leather Cord Bracelet |
Tie it tightly at one end of the leather cord.
| Leather Cord Bracelet |
| Leather Cord Bracelet |
One more knot to ensure that wax cord wrap around tightly.
| Leather Cord Bracelet |
| Leather Cord Bracelet |
| Leather Cord Bracelet |
| Leather Cord Bracelet |
| Leather Cord Bracelet |
Another knot to make it nicely looking.
| Leather Cord Bracelet |
Do the same at the other end of the leather cord. Close the bracelet with fisherman's knots on both sides.
| Close the bracelet with fisherman's knots |
| Leather Cord Bracelet |
Now we make another bracelet using the similar method:
| Leather Cords and metal parts |
| Leather Cord Bracelet |
| Leather Cord Bracelet |
| Leather Cord Bracelet |
Put all cords through a metal ring.
| Put all cords through a metal ring |
Twist all cords to the braid pigtails.
Use one of the cords to tie them together.
| Leather Cord Bracelet |
| Leather Cord Bracelet |
| Leather Cord Bracelet |
| Leather Cord Bracelet |
One more knot to make it tight.
| Leather Cord Bracelet |
Close it with fisherman's knots.
| Close with fisherman's knots |
| Leather Cord Bracelet |
Tuesday, July 30, 2013
Weekly Discount: 50% off Glass Beads & Pendants at anybeads.com
50% off Glass Beads, Silver Foiled Glass Pendants, Glass Tube Beads, Square Shaped Glass Beads, Big Hole "Pandora" Style Glass Beads.

Check out the Glass Beads & Pendants in anybeads.com
Monday, July 15, 2013
How to make a Stretch Bracelet using Elastic Cord
Stretch Bracelets is fun and simple to construct. They can be made by using all kinds of gemstones, fancy beads, crystal and pearls. However, there are some technique that you have to learn to make bracelets that won't fall apart.
 |
| Stretch Bracelet made with Glass Beads |
Materials needed to make stretch bracelets.
1. Elastic Cord / Stretch Cord
 |
| Elastic / Stretch Cord in different sizes and colors |
You can buy Colored Elastic Cord in our store.
Just like other stringing materials, elastic cords come in different thickness. Thickness is measured by mm (for example: 1.0mm is thicker than 0.5mm). The cord should easily fit through most of the holes of the beads. If you are using heavy or large beads, it's better to use thicker cord.
2. Beads
You can use a lot of different kinds of beads, small & medium size beads usually work better. There may be gaps if you use beads which are too large (over 10mm) or too heavy. Avoid beads with rough edges as it may cut into the cord and damage it.
You can use a lot of different kinds of beads, small & medium size beads usually work better. There may be gaps if you use beads which are too large (over 10mm) or too heavy. Avoid beads with rough edges as it may cut into the cord and damage it.
3. Glue
Apply a little bit of glue onto the knot of the bracelet to add extra strength. GS Hypo Cement is a good choice, it has a tiny tip for easy and accurate application. You can buy GS Hypo in our store.
Apply a little bit of glue onto the knot of the bracelet to add extra strength. GS Hypo Cement is a good choice, it has a tiny tip for easy and accurate application. You can buy GS Hypo in our store.

Start making the stretch bracelet
1. Measure the size of your wrist. Cut the elastic/stretch cord according to the size you need, remember to add an extra 1 inch (2.5cm) on each side of the cord, so that you have enough extra cord to tie your knot.
2. Use a paper clip or sticky tape on one end of the cord and start stringing your beads.
3. After you had finished adding your beads, you have to tie a knot to "close" the bracelet. Take each side of the elastic cord and tie an overhand knot, pull it tightly. Then tie another overhand knot in the opposite direction and again pull the knot tightly. If you want a more secure knot, you can tie a third overhand knot.
 |
| Tie an overhand knot and pull it tightly. |
 |
| Tie another overhand knot in the opposite direction and again pull the knot tightly. |
4. Cut the extra cord close the knot and try to hide the
knot inside the hole of the nearest bead. You can use a large hole bead
to hide the knot if your knot is large.
5. Apply a tiny drop of GS Hypo glue to the knot to further strength the knot. Let the glue dry for a few hours.
6. Alternatively you can use crimp beads/cover to close and
hide the knot, however, avoid poor quality crimp bead or crimp with
sharp edges as they may weaken or even cut into the cord.
7. Let the glue dry for a few hours before wearing.
That's done and you make yourself a great stretch bracelet!
7. Let the glue dry for a few hours before wearing.
That's done and you make yourself a great stretch bracelet!
Monday, June 17, 2013
DIY Swarovski Crystal Rhinestones Cell Phone Case
 |
| Swarovski rhinestones cell phone case |
Nowadays,
rhinestones cell phone cases are popular, but they are expensive! Why don't we make one by ourselves?
We need the following items to make one:
Swarovski Crystal flatback rhinestones 2058 Xilion Rose Enhanced no hot fix SS10:
- Clear Crystal around 3 gross (432 pieces)
- Fuchsia around 1 gross (144 pieces)
- Light Rose around 1 gross (144 pieces)
- Rose around 1 gross (144 pieces)
1
x Transparent plastic cell phone case
1
x Pattern grid
 |
| Swarovski rhinestones, rose, light rose, fuchsia, GS glue, rhinestone picking pencil |
I
found a pattern that I like and printed it out as a hard copy by
using a computer program. Then stick it to the inside of a
transparent cell phone case. Of course, it is
better to have a color other than a black and white copy. But I had a
black and white copy this time, fortunately, there was only a few
color variations of the pattern.
Dark
gray--->Fuchsia
Light
gray--->Rose
Pale
gray--->Light Rose
White--->Crystal
Now,
I started to stick the rhinestones. Some people
prefer to put the rhinestones line by line because it is easier and
neater, but as a trial, I would like to put the rhinestones by colors
and see how it works.
I
first stick the Fuchsia rhinestones, squeezed a little bit of GS glue onto the case and picked a Fuchsia rhinestone using the the rhinestones picking pencil and put it onto the glue. Before the glue dry, move the rhinestone so that they align properly. Keep on sticking until all dark gray grids were filled.
 |
| Squeezed a little bit of GS glue on the case |
 |
| Picked a Swarovski Fuchsia rhinestone and put it onto the glue |
Then,
put Rose rhinestones to fill all light gray grids.
 |
| Squeezed a little bit of GS glue on the case |
 |
| Picked a Swarovski Rose rhinestone and put it onto the glue |
 |
| Squeezed a little bit of GS glue on the case |
 |
| Positioned the Swarovski Rose rhinestone before GS glue was dry |
 |
| Filled all light gray grids with Swarovski Rose rhinestones |
Continue to stick all the Light Rose rhinestones to fill all light gray grids.
 |
| Squeezed a little bit of GS glue on the case |
 |
| Picked a Swarovski Light Rose rhinestone and put it onto the glue |
 |
| Filled all light gray grids with Swarovski Light Rose rhinestones |
Finally,
filled all the rest by Crystal rhinestones.
 |
| Sparkling Swarovski rhinestones cell phone case |
Oh...DONE!!
This is what I had made for myself, a sparkling cell phone case make with Swarovski crystal rhinestones. I
could not believe that I can finish it so quickly. It is especially sparkling because i use Swarovski crystal rhinestones, it's really beautiful! I love it!!!
Subscribe to:
Posts (Atom)